


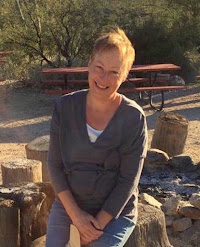
Memoirist and Singer/
Songwriter Elisa Korenne
Elisa Korenne entered the creative-writing world as a songwriter.
She'd written a lot of
prose up to that point, mostly in the form of academic papers, but it
was songwriting that acquainted her with the thrill of word textures,
imagery, and choosing the right word for the right moment. In this
guest post, she describes her writing process and how she uses image
boards to get closer to the meaning of her story--and her songs.
When
I moved from New York City to rural Minnesota (to a town conveniently
named New York Mills), songs were not the medium I wanted to express my
experience. I started writing a memoir.
I wouldn't
say that the beginnings of my memoir could be considered "creative
nonfiction," but over time, and with the critique of Mary Carroll Moore
and her classes, I began to connect the artistry and imagery of
songwriting with the form of the written word, and entered the universe
of creative prose.
Today, I am nearing (please let it be so!) the final revision of my memoir, Hundred Miles from Nowhere. I also continue to write songs.
In
prose, I continue to write creative nonfiction based on my life
experiences. In songwriting, I write in two discernible but connected
pathways--both related to the human experience. One set of songs
tracks my own experiences, and the other is a set of song portraits
featuring unique individuals in American history.
(Learn more and listen to Elisa's music at www.elisakorenne.com.)
Using Image Boards for Inspiration
My first image board came from working with Julia Cameron's The Artist's Way. Cameron's exercise asks the reader to create a collage of themselves, considering their past, present, and future.
This collage became my gateway into songwriting.
I
put a picture of me in the center, and pictures of guitars and
performers all around me. I pinned the image board up on a hidden wall
in the closet of my Brooklyn apartment where I'd happen upon it every so
often, but usually only when I wanted to look at it.
A
few years later, I looked at it again, and everything on it had come to
pass: I had gone from never writing a song to becoming a professional
singer-songwriter. I never doubted the power of image boards again.
Mary
taught me I could use image boards to benefit my writing. I made one
in her online Loft class, another in her in-person class on Madeline
Island, WI, and more at home. All served my memoir.
As
an intellectual person whose default mode is analytical, I tend to miss
the softer, subtler, more artistic themes in my writing. Image boards
gave me a new way to see my material and led me in new directions. One
image board I made in Mary's class completely changed a key plot point
in my book, just because it showed me a connection I had never seen
before.
By
approaching my writing through the medium of visual imagery, I can more
easily approach all the imagery--visual, sound, smell, taste, touch--in
my book.
Building Texture from Tactile Images or Digital Images
I
love to play with real paper, feeling the different textures of the
different source materials, and hearing the sound of papers shuffling.
But recently I learned about the technique of creating a digital image
board using digital photographs.
Once
I realized that a digital image board could become my computer's
wallpaper, something clicked for me. Usually my paper image boards get
shoved in a closet, and, unlike my first collage, not even pinned up on a
closet wall, just stuffed in a dark corner. An image board that could
be the background of the place where I focus most of my attention while
writing and working and doing online socializing--my computer
screen--had the potential to be incredibly powerful.
Here are the steps I use to create image boards. First, the three-dimensional, paper image board:
1. Foundation: I
start with a large piece of paper. Posterboard is great, but since I
never seem to have a piece of posterboard around when I need it, I've
gotten really good at cutting down brown paper shopping bags into a
large flat surface. It's cheap, and a great way to recycle them!
2. Source collection: I
go through all the areas in my house where magazines or other paper
goods with pictures might be stored: the bathrooms, the family room, old
piles of mail, my greeting card collection.
3. Image discovery: I
flip through all the images as quickly as I can and cut/tear out any
that grab me. I try not to figure out why something grabs me, and just
accept that it's something worth keeping.
4. Placement: I place all the images on the large paper and move them around till the arrangement pleases me.
5. Adherence:
Using tape or glue, I stick the images onto the backing paper. Usually
the images end up moving around a bit during this part of the process
because I've mis-remembered where one goes, but it all works out in the
end.
6. Awe: I stand back and look at what I've created, and let my mind go wild trying to draw conclusions and make connections.
And for the digital image board (which requires a bit of technical savvy to complete):
1. Foundation: For
the digital equivalent of a "large piece of paper" to stick images on,
you need an image arranging program. I use Photoshop, which gives me a
great deal of control over all of my images. You can probably also use
Illustrator or publishing software or, for those of you not comfortable
with those programs, even Word. If you use Word, I recommend that you
get very comfortable with the "Format Picture" and "Layout" functions.
Create a file with the dimensions of your screen, or (see hint in # 6)
somewhat smaller than your screen.
2. Source collection: The
selection of digital images worked a bit differently for me as the
Internet is not as limited as my house's paltry collection of magazines.
So, I had to start by thinking about what themes I wanted to collage
about. For example, I want to work on a collection of songs about the
fine line between sanity and insanity--for now I call it "My Crazy
Show"--so I put the word "crazy" into Google Images' search field. I
received pages upon pages of wonderful images, and even some help in
narrowing down the kinds of images I was looking at.
3. Image collection:
When I found images I liked, I right-clicked on the image and saved the
image to my hard-drive by selecting "Save Image As.." and putting it in
a folder on my desktop.
4. Placement: When
I had enough images, I created a background by duplicating a
photograph, and then pasted images on top of the background how I felt
they worked best. Sometimes I shrank or enlarged images to make them fit
in better with the gestalt. Other times I grouped images together so I
could more easily move them around.
5. Storage: When all the images were in place, I saved the file as a jpeg.
6. Display: To
make the image into my wallpaper, I went into my system preferences and
chose that image to be my wallpaper. Hint: It helps to size your
digital image board so that it doesn't take up your whole screen. That
way you have vertical or horizontal bars of a solid color where you can
put the files you keep on your desktop. Otherwise, the digital collage
can be visually busy, and files can't be seen. Full disclosure: this
happened to me by mistake because I had originally sized my image
incorrectly, and then I realized it was better so I kept it.
How Image Boards Help Me Get Closer to My Story
I respond best to image boards in the beginning or at a conceptual, strategic
stage of a project. It's at this time that I have the most "ah-hah"
moments because the image board helps me see possibilities I wouldn't
have otherwise thought of.
When
I'm further along in a project, I resist the power of image boards
because sometimes the possibilities they show are too overwhelming to
consider ("gotta get rid of that main character, time to start over!").
Image
boards are a result of the uniqueness of a writer's voice, and, by
showing the writer the voice they already have, they serve to amplify
it.
Phew!
Thinking about my digital image board process may have been more
difficult than actually doing it! I have just one more thing to say:
Please like my facebook page: www.facebook.com/elisakorenne.


No comments:
Post a Comment